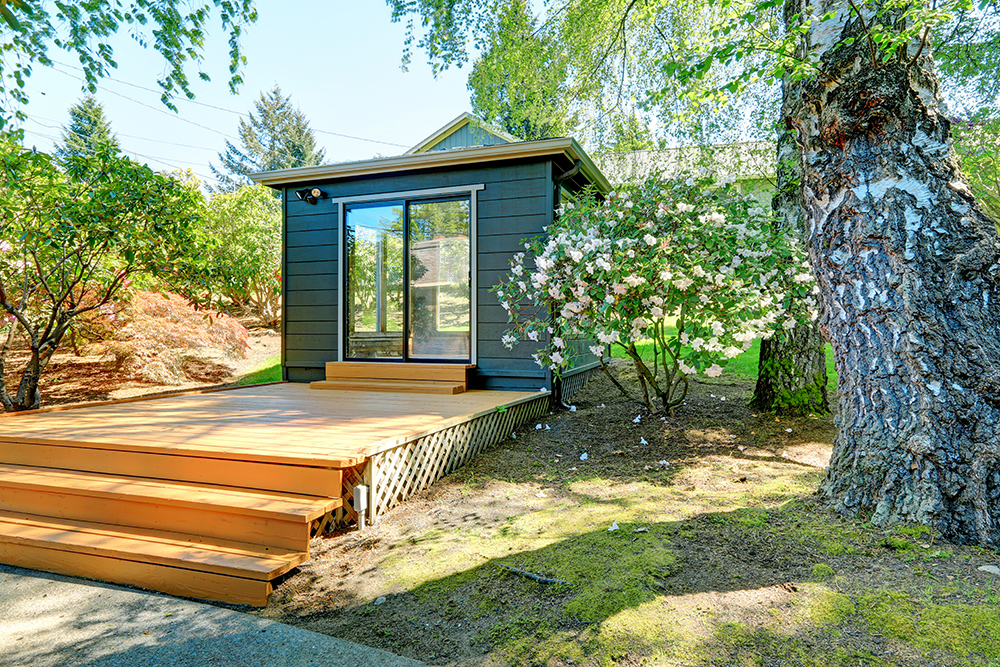
Log cabins have become all the rage since Covid, as working from home is now the new norm.
Although not everyone is lucky enough to have a spare room they can use as an office, some are lucky enough to have the space they need in their garden. Choosing an outdoors office such as a log cabin works perfectly, as aesthetically they suit most gardens, they come in many different sizes, can be used all year round if insulted, and you can paint them whichever colour you please. Plus, painting log cabins also helps to preserve the wood and help the structure last longer. It is a large investment after all and you would not want it to rot.
However, for some the idea of painting a wooden log cabin is not always an easy option, as they don’t have the spare time or the skills to take on such a job. There’s no shame in hiring the services of a professional, but if you do decide to do it yourself here are some essential painting tips:
Wood Preparation
Whilst painting your log cabin will add a whole new look, it will unfortunately not hide many of the imperfections found naturally in wood, especially if you haven’t painted your cabin in sometime. Where cracks, holes, or other imperfections have formed in the wood, it’s best not to ignore them and just paint over them. You need to fix the problem and prepare the wood ready for painting.
Scraping
If you’re log cabin has been previously painted you should work on removing this first, as it will affect the look of the new coat. Removing all the old paint at this stage is not important, as later on you will use sandpaper to remove any paint that remains on the surface.
Filling
Next, you need to look over the wood for any cracks or holes, as you will need to fill these in before you start painting. For the holes you will need wood putty, and for the cracks you will need to use caulk.
Sanding
Now that you have removed the old coats of paint and dealt with any weaknesses in the wood it’s time to smooth out any uneven surface, before proceeding with painting. Use sandpaper on all surfaces, as this will help in removing the old paint and helps prepare the wood for priming.
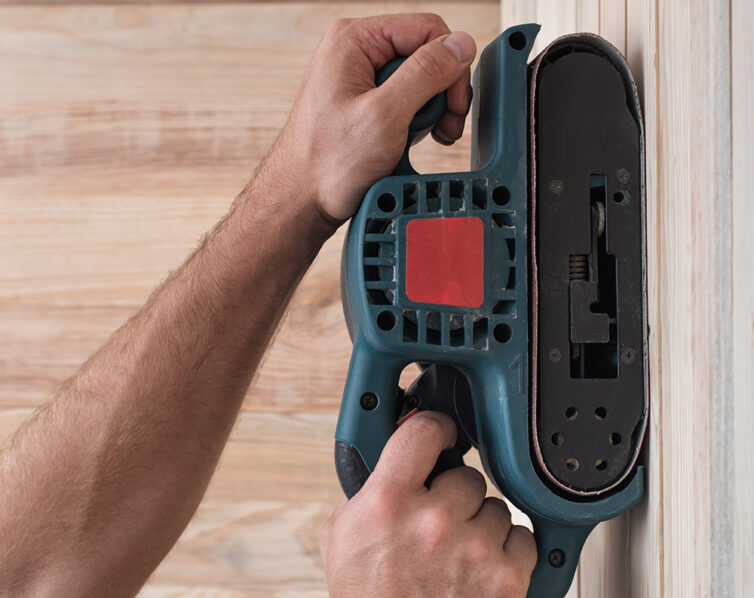
Pro Tip: For the best results you should work with the grain of the wood, instead of against it.
Cleaning
Next step is to clean all the dust off that remains on the wood, as it can get in the way of a good paint job. Vacuuming can be a great way to deal with dust. If you don’t have a vacuum cleaner present, just use a damp cloth, then leave the surfaces to dry out completely. If you attempt to prime or paint the wood while it’s still damp, the results will not be perfect.
Priming
If you want to achieve a uniform look, then the priming step is vital. All you need to do is apply one coat of primer, then when you come to paint your log cabin, you will find that the overal result is greatly improved. Sometimes, priming will lead to the rising of wood grains. If this happens sand the wood with fine sandpaper, as this will fix the problem.
Pro Tip: Ensure that you wipe off the residual dust before working on the wood again.
The colour of the primer will ultimately affect how good the paint job looks. For dark hues, use a grey primer and for bright colours use a white primer.
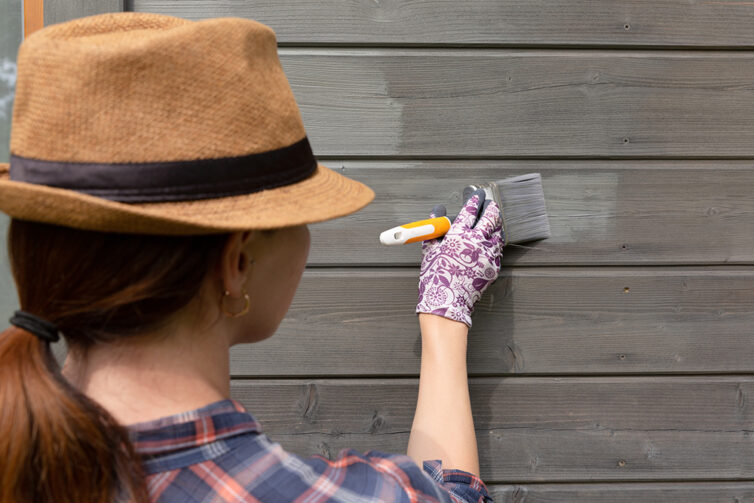
Painting
After the above preparations, your log cabin is finally ready to be painted! Start by selecting a paint based on its formulation and sheen (gloss/matt/satin) and don’t forget to use high-quality brushes for the best results. Plus, remember to work from the top to the bottom when painting, then fill in any gaps with sealent.
With regular painting and maintenance, it should be easy to keep your log cabin looking in tip top shape.


