
Fingers crossed that the spring will bring some calmer, brighter days, eliminating the bitter cold so we can get out in the garden and create something of a social hub in time for summer.
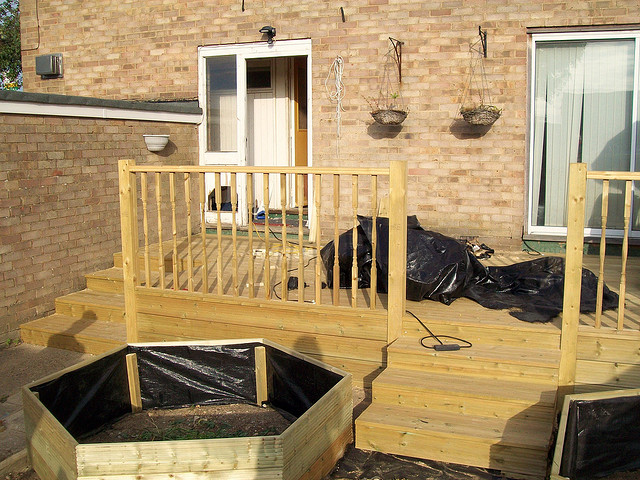
If you’re good with your hands, or just fancy a big project to keep you occupied, then doing a bit of DIY decking is the perfect route to go down.
It may seem like a huge task to some, but don’t worry, I’m here to break it down and hopefully make it seem like less of a back-breaking mission.
Tip 1. Tools For The Job.
You’re going to have to get your shopping list out here and head down to your local hardware store and gather up the raw essentials for the job.
You will need:
- Deck Kits, Tiles and Packs. Depending on the size of the area you want to cover, the quantity here is up to you.
- Tape Measure. A simple, yet vital ingredient to the building process. Make sure you’re savvy with measuring skills before you dive straight-in. There’d be nothing worse than uneven decking!
- Cordless Screwdriver/Drill. Cordless is essential; you don’t want to be dragging a long extension lead around whilst your in the construction zone. It’s dangerous and not very nimble for when you’re tightening screw and bolts in awkward spaces.
- Other must-buys include self-explanatory extras like nails, a hammer and a saw.
Tip 2. Foundations.
For a stress-free building experience, you ideally want to be building upon flat, level ground. Sloping sites are fat too difficult to fully utilise and will more than likely cause some headaches in the building and measuring stages.
If you’re building upon an old patio or garden path, keep the concrete because it provides a solid, even base for when you’re constructing. You also need to lay down a membrane to keep those pesky weeds at bay.
Tip 3. Check Your Figures.
It always helps to be too careful I always say. Measuring twice, though it takes twice as long, will always end in your favour. Mapping out the sizes and lengths of your decking is the most important part, essentially. Using string, or chalk spray will make this easier, so add those to your list!
Tip 4. Have A Little Patience.
It’s key to have quite a bit of time set aside for a project of this magnitude. Not to mention it can be very demanding, mentally and physically.
Grab a trusted friend to help you out with any heavy lifting and measuring to reduce the risk of a tantrum.
Once you’ve marked out the dimensions for construction, hold your horses and lay off building for a while. Live with what you’ve mapped out to get a feel of just how well situated your decking is. Put some chairs down and consider whether it’s too windy in the location, or too hot when the sun is directly on you, what the view is like. All these variables that NEED to be taken into account. After all, you want it to be absolutely perfect, right?
Tip 5. Choice of Wood.
You can’t go wrong when choosing timber for your decking. All that really matters, it how carefully you measure, cut and piece together!
Tip 6. Maintaining Your Masterpiece.
Clearly after all this hard work you want your decking to last a lifetime. I recommend painting or staining your deck, or if you prefer, watch it age naturally. A pressure washer is brilliant every so often to blow away the cobwebs and erase scuff marks and stains.
So if you’ve managed to get this far without setting the materials on fire, then you deserve a round of applause. Kick back, have a cold one and enjoy your man-made decking.


